Nov 4, 2011

Handmade Holidays Blog Hop!


Welcome to the Handmade Holidays Blog Hop!!!

This stop is all about what you can do with SPELLBINDERS!


Calling all crafters! We’ve gathered designers from some of our favorite manufacturers to show you ways to create something from the heart this holiday season. This 3 day Hop includes over 60 stops with inspiration brimming from every corner. Explore all thoughtful and frugal handmade gifts you could make for the holidays, all in one place on this Hop!


To sweeten to Hop, we’re offering a gift for you! For every comment you leave on the blogs in the Hop, you’ll be entered to win a prize pack from one of the participating manufacturer sponsors!


Here is what you could win from Spellbinders™!


Visit the list of blogs below and leave a comment on each by Nov 7, 2011 at 11:59 PM PST. Each day we will be sharing a brand new list of blogs with brand new projects for you to explore, be inspired by, and create from!


November 4th, 2011 
HOP LIST


Cheers to creating gifts from the heart this holiday season!


Happy Hopping!


_________________________________________________________


HERE IS MY FRUGAL GIFT!

I'm glad you're here!  I was thinking long and hard about what I wanted to make for you today and with so many Spellbinders die templates at my disposal, the possibilities were endless!  I finally settled on a set of homemade gift tags, which if you omit the tools and inks, this gift can me made for under $10.00.  You can stamp To: and From: on the back, which is clean and available for a personal message, or you can write the person's name on the front, where there is white space.

This is also the type of project you can do in pieces, and in front of the TV.  Make all your die cuts, ink flowers, assembles flowers, assemble tags, etc...

Personally, I love PRACTICAL gifts, things that I can use, and these are totally gift worthy and will dress up any gift beautifully.  They can take a bit of time to make, but will get you that response you're looking for.  No one will associate this gift frugal, because they can see the heart that goes into handmade tags.

I do hope you enjoy the hop today!  Merry EARLY Christmas.


Vintage Christmas Tags


1. Die cut and emboss labels (Spellbinders S4-346 Labels Twenty-Two) from cream cardstock.  Leave paper in the die template and use as a stencil and apply Clearsnap ink (Shabby Pink) to the edges using a Clearsnap  Stylus with blending foam.


2. Die cut and emboss poinsettias pieces from patterned paper using Spellbinders S5-055 Layered Poinsettia.  Leave papers in the die templates and use as a stencil and apply Clearsnap ink (Shabby Pink to Poinsettia and Aqua to Leaf) to the embossed portions on the die cut image (apply Clearsnap ink using a Clearsnap Stylus with blending foam).


3.  Die cut and emboss Spellbinders S5-062 Lacey Doily Accents to create a lacey accent to the label.

4.  Cut out Christmas images from patterned paper and distress edges with scissors.


5.  Glue together poinsettia pieces with Glue Arts Micro Adhesive Squares, adhere gem for the center (Want2Scrap).   Bend poinsettia petals to make the flower more dimensional.


6.  Assemble tags by adhering items in this order: lacey accent strip, ribbon tied in a bow, poinsettia (with Glue Arts U-Cut-It 3D Foam), leaf, and 2 Christmas images (some with 3D Foam).  Punch hole, adhere string.


7. Add Stickles or glitter glue to the top corners of the Christmas images, let dry.


Beautiful Gift Box


1. Using the Spellbinders Grand Calibur die cut machine, cut and emboss 2 grand labels (Spellbinders LF-347 Grand Labels Twenty-Three) from cream cardstock.  Leave paper in the die template and use as a stencil and apply Clearsnap ink to the edges using a Clearsnap Stylus with blending foam.


2. Die cut a hole at the top of both labels using Spellbinders S4-190 Labels Four.

3. Cut 2 strips of cardstock (3.5 x 12) to make the sides and bottom.  Using a Scor-Pal, score lengthwise at 7 inches.  Turn to the width, and score at 1/4 inch in from each side.   Because you want the top of the box to fold in, you need to make one more score at the top of the sides.  At 1.5 inches (which is the middle), score each side 1/2 way down.


4. Make triangle cuts at the corners.  This will make the corners fold in easily.


5. The bottom will be 5 inches total, so glue the bottom pieces together, ensuring a total length of 5 inches (you can use your Scor-Pal for measuring).


6. Using your Glue Arts Glue Glider Pro+ or similar, adhere adhesive strips to the folds, glue box together, one side at a time.


7.  Fill with your homemade tags and use one of your tags to decorate the front.  Glue sides together once filled with Glue Arts Extreme Adhesive Squares.


8. Stamp Merry Christmas (Unity Stamp Co) onto white paper, ink around edges with Clearsnap ink, and adhere to box with 3D Foam.


Supplies:

Vintage Christmas Tags
Spellbinders S5-062 Lacey Doily Accents
Spellbinders Grand Calibur Die Cut Machine
Clearsnap Ink (Surf's Up ColorBox Queue, Swell ColorBox Queue)
Clearsnap Stylus
Clearsnap Blending Foam (Round Tip)
Graphic 45 Patterned Paper (Christmas Past)
Glue Arts Micro Adhesive Squares
Glue Arts U-Cut-It 3D Foam
Bazzill Cardstock
Want2Scrap Pink Gems
Stickles (Rock Candy) by Ranger
Hole Punch
Ribbon
String

Beautiful Gift Box
Spellbinders S4-190 Labels Four
Spellbinders Grand Calibur Die Cut Machine
Clearsnap Ink (Swell ColorBox Queue)
Clearsnap Stylus
Clearsnap Blending Foam (Round Tip)
Glue Arts Glue Glider Pro+
Glue Arts U-Cut-It 3D Foam
Glue Arts Extreme Adhesive Squares
Bazzill Cardstock


Thanks for stopping by.


NEXT STOP:

Daniela Dobson – Clearsnap  http://danieladobson.blogspot.com/

Nov 3, 2011

Up the Street Scrapbooking November Kits!

It's that time again - the kit reveal for Up the Street Scrapbooking!  

I love these kits, and I'm not just saying that!  I hope my work shows how much I enjoy working with these.  You can enlarge the photos to see more detail.

I was lucky to be able to work with both sides this month, both so different, and so lovely.  I particularly fell in love with the color palette of Side #1 Autumn's Embrace, which surprised me, because I tend to stay away from gold and burgundy.  What I think happened, is that Up the Street just knows how to put together a SOLID kit that helps your projects come together effortlessly.  And I'm not done, I still plan on making more projects with these kits which I'll reveal later in the month.

Without further babbling on my part....here are my projects from the November 2011 kits.

Spellbinders™ Spiral Blossoms One (rolled flowers)
Spellbinders™ Anemone Flower Topper (stacked flowers)
Spellbinders™ Grand Labels Twenty-Three
Spellbinders™  On the Vine Border Grand
Studio G Paint by Ranger
Gesso Paint


I just love those Prima sparkle dots (blue)!  And the Basic Grey chipboard is lovely too.


These are Spellbinders die templates.


The Trail
Black Sharpie Pen (to make stitches)


Love these colors together!  And all the chipboard pieces to choose from.


Take Note Card Set
Black Sharpie Pen (to outline circles)
Spellbinders™ Standard Circles LG
Black Ink
Ribbon


I had a vision of this card set in my head, and it came out just how I wanted.  Something quick, a little messy, and not too much color.  


I adore these envelope.  I wish I had hundreds of them. 
I would use them ALL THE TIME for many projects.


You're So Sweet
Spellbinders™ Holly Motifs 
The Twinery Twine


See what I mean about the color palette.  LOVE IT.  I used some Spellbinders die templates on this one - they are Holly Motifs for Christmas (see behind photo), but I just love how dainty they are for any project.


Adore all this Crate Paper chipboard.  Love to layer it too.


Prima makes these cute gems - LOVE THESE COLORS!


Oh Happy Day!


So I had to dig to find these photos, my son and his CRAFT DAY treat that he made at school.  Most kids make cotton balled and paper things, that are fun, but don't make it past the holidays.  This year, my son made a Gingerbread House.  LUCKY!  AN EDIBLE CRAFT!  He couldn't wait to eat it.


This chipboard rocks.


Check out the complete kit supplies HERE:

Oct 29, 2011

Homemade Envelopes Video for Glue Arts

This week, we are working with Webster's Pages products and I decided to make a video, on how to use beautiful patterned paper to make fancy envelopes.  You can see the new Glue Glider Pro+ in action too!

See the full blog post HERE on the Glue Arts blog.


Thanks for watching!

Oct 25, 2011

Spellbinders Contest and DT Projects

It has been 7 months since I started with Spellbinders and I have so much to share.   I would say that I've noticed an improvement in my designs and projects with the addition of die templates.  Before I made the Spellbinders design team, I had their circles, squares, scalloped circles, etc.  The basic shapes, which I mostly used for cards.  Since the team, I have started to use so many more shapes and labels, and not just for cards, but as you'll see below, for 3D items, layouts, jewelry, and even felt coasters!  Those are particularly easy to make (just get some sheets of cork for the bottom).

DESIGN TEAM CALL:
The Spellbinders design team contest has been announced for next year!  I would encourage anyone who loves their Spellbinders products to apply.  The people behind the business are fantastic, as are the people they hire to work with the design teams.  It's a pleasure to work with Spellbinders.

Contest Information HERE> Spellbinders Paper Arts Design Team Contest 2012

SOME 2011 PROJECTS:
And here are some projects I've made to date using some of the new Summer Release 2011 die templates.  The supply lists are linked to the Spellbinders products, just in case you want to see the whole set of die templates.

Thank You Basket

Spellbinders Supplies:


A Gift for You (Pocket Card)

Spellbinders Supplies:


Lilac Necklace

Spellbinders Supplies:


Felt Coasters

Spellbinders Supplies:


I Spy Fall


Spellbinders Supplies:


If I were a Cherry Picker


Spellbinders Supplies:

S4-114 Standard Circles LG


Your Guidance


Spellbinders Supplies:

S4-114 Standard Circles LG


I'll share more soon!  Hope you have a wonderful Tuesday.


Oct 24, 2011

Winner of the Glue Arts Pro and Pro+


Winner of the Glue Arts Glue Glider Pro and Pro+ Cartridge is.....


Blogger Paulette Still said...

What fun flowers.

Thanks for all who entered.

Paulette, please email me your mailing address at lesleylangdon@cogeco.ca.

Oct 21, 2011

The New Glue Arts Pro+ Giveaway HERE!


Leave a comment on THIS POST right here over the weekend and I'll pick ONE winner on Monday to try out:
1 NEW Pro+ Cartridge
1 Glue Glider Pro

**1 Entry per person, chosen at random.

The new Pro+ works with your existing Glue Glider Pro and together, it gives you the best in adhesive application.  Whoot whoot!  I am always impressed with Glue Arts and their innovation, and desire to constantly review and improve their products.  They are amazing and SO generous with all their giveaways.

ALSO - check out the Glue Arts Blog for fun crafts and projects using Glue Arts products and for weekly giveaways.

Thanks Glue Arts for letting me give one of my blog readers a prize!


And check out my project featured today on the Glue Arts blog!


Supplies:
Glue Arts Glue Glider Pro (Pro+ Cartridge)
Glue Arts Hot Glue Gun
AUTHENTIQUE Glowing Collection (Patterned Paper, Stickers, and Die Cuts)
Spellbinders S4-352 Spiral Blossoms Two (Die Template)
Spellbinders LF-012 Square Petal Top Box (Die Template)
Spellbinders Grand Calibur Die Cut Machine
Shimmerz Coloringz (Mon Shari Spritz)
Buttons by Buttons Galore and More
Creative Impressions Ribbons


Oct 18, 2011

Spellbinders & Unity Blog Hop - Day 2

Welcome to our TWO-day event!  


You should be joining me from Heidi Blankenship's blog  Embellished Dreams , if not then head to the beginning on the Unity Stamp Co. Blog.

With all the blog-swaps that are happening out there lately, I can't think of one more exciting than when the amazing women of SPELLBINDERS™ get together with the rock stars of UNITY STAMP COMPANY!

We can't wait to show you a special line of coordinating products featuring SPELLBINDERS dies and SAMANTHA WALKER for Unity Stamp Co. rubber stamps!  

***PRIZE ALERT***
Not only are we thrilled to be collaborating on such a special 2-day event, but ONE of you will win ALL of the coordinating stamps and dies from the Samantha Walker collection!  We will also have 1 winner each day from the comments that will receive 1 Samantha Walker stamp set and coordinating dies.

So be sure to enjoy our hop both days, leave comments on all of the blogs each day and check back to see if you won (winners will be posted on Wednesday, October 19th on the Unity Blog and Spellbinders Blog).

I consider myself extremely fortunate to be designing for both of these amazing companies, and then throw in the whimsical and fun designs of Samantha Walker, and my happiness is magnified.

Today, I am pleased to share with you Retro Mod Clocks stamps and die templates.

To Make the Clock:
1. Die cut large clock from cereal box board, stamp matching stamp onto the die cut, then ink around the edges.
2. Die cut additional circle, stamp the clock face onto the circle and adhere it to the main clock with 3D foam.
3. Apply Stickles (Cinnamon) to the entire clock, following the design of the stamped image.


Spellbinders S5-074 Retro Mod Clocks Die Templates:


Supplies:
Retro Mod Clocks Stamps by Unity Stamp Co.
S5-074 Retro Mod Clocks Die Templates by Spellbinders
S5-027 Labels Twenty-One Die Templates by Spellbinders 
Vintage Photo and Walnut Stain Distress Inks by Ranger
Black Memento Ink by Stewart Superior
Cinnamon Stickles by Ranger
Clearsnap Ink (Basic ColorBox Queue)
Gems by Want2Scrap
Ribbon by Offray
Waxed Cord
Adhesive by Glue Arts (Extreme Adhesive Squares, U-Cut-It 3D Foam)


To continue on the hop, please head over to Maria Gurnsey's blog Gingham and Polka Dots for more inspiration!  


Next Blog


Have a great day!


Oct 14, 2011

Spooky Tags

Here are some tags I made for Unity's blog today...

Tags are so quick and easy and great to throw on a bag of goodies (think cookies, candies, and spooky presents).  I made these tags using a lot of stamps from Echo Park's stamp set called FRIGHT NIGHT.

To see more stamps from Echo Park, see HERE for the Unity web site.


$19.00 (USD)


Supplies:
Unity Stamps (Fright Night)
Staz-on Ink Jet Black
Shimmerz Coloringz (Mandarin Mai Tai, Mon Shari)
Shimmerz Vibez (Hermit the Frog)
Pear Tart Memento Ink by Tsukineko
Adirondack Ink Brights Sunset Orange by Ranger
Clearsnap Ink Color Queue CHIC (Boysenberry)
American Crafts Ribbon (Black)
Copic Marker (Black)
Shipping Tags, Staples, String and Buttons

Have a great FRIDAY!


Oct 7, 2011

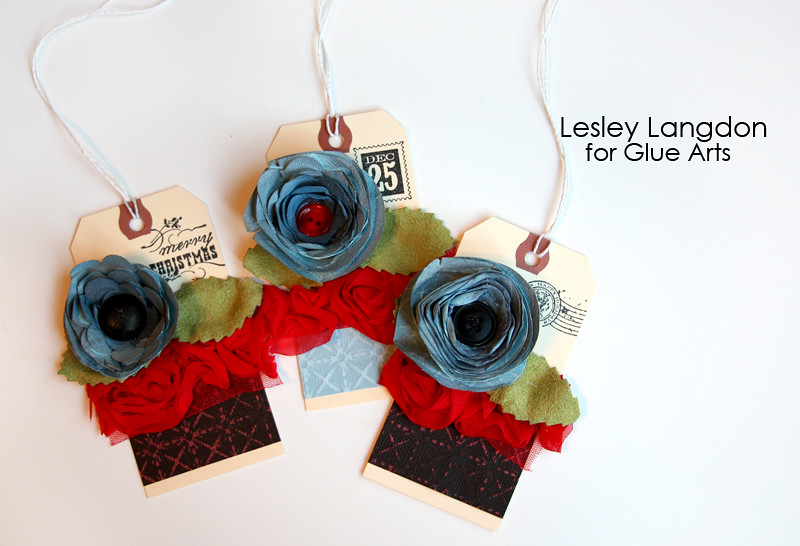
Christmas Tag Trio with Glue Arts


Glue Arts is showcasing their products this week, using Core'dinations products!

See the Glue Arts Blog for some Core'dinations/Glue Arts giveaways - leave a comment over there for a chance to win some amazing prizes!

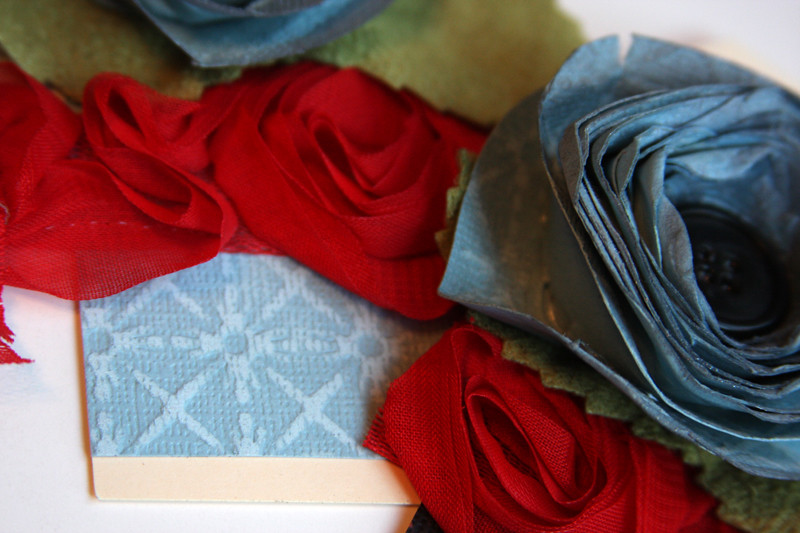
Here is my project this week, making QUICK tags.  You can make all your flowers in one sitting, then the tags come together so fast!  They would look great with your presents that are wrapped in kraft paper.  You can write on the back, it's empty!

All full projects with instructions are on the Glue Arts Blog (link is on the title of project).

Core'dinations Cardstock


Supplies:
Glue Arts Pro Plus (Perma Tac)
Glue Arts Glue Gun
Cardstock: Core'dinations ColorCore Cardstock (Core Impressions: My Mind's Eye Lost and Found Collection)
Sand It Gadget: Core'dinations
Dust Buddy: Core'dinations
Die Templates: Grand Scalloped Circles Nestabilities® by Spellbinders
Die Cut Machine: The Grand Calibur by Spellbinders
Mists: Shimmerz Paints (Mama Sings the Blues, Licorice)
Stamps: Unity Stamp Co (25 Days of Christmas)
Ink: Memories Ink
Ribbon: May Arts (Leaves), American Crafts (Red Roses)
Tags: Office Depot
Other: String, Buttons


Oct 6, 2011

Glue Arts Contest Link

For those having trouble seeing the link to the contest on the main PRO PLUS page....here is the direct link to enter:

http://www.gluearts.com/procontest

You have until Oct 10th to enter!  Good luck.

Oct 3, 2011

Glue Arts Has Some NEWS!


Glue Arts has developed a NEW PRODUCT that has some cool features, meant to work with your Glue Glider Pro, and you can win some!

  See HERE to enter and Glue Arts Pro Plus and for more details!

Whoot whoot!  Good luck.  I have tried this new advancement and it's as smooth as butter and glides which ever direction you want (toward you, or away from you, just flip it around!).


Have a great day!