Mar 30, 2010

Hands On Photography

Canadian Scrapbooker magazine has a column by Sue Sykes called Hands On Photography which gives you tips and techniques for better photographs. For March/April, there is a little blog contest going on over HERE, but really, it's not for the prize that I'm doing it, it's for the lessons! When you submit your photos, you have to indicate the variables like this - f/3.5, 1/20 sec, and ISO 800. I don't have a clue how to use these settings to their full potential, and it's about time I learned how to use my camera! Truthfully, I didn't even know how to retrieve that info and had to put the card back into my camera and press "info" to find it.

Here is my picture to showcase front lighting, with my daughter positioned to face the window.
And here is my picture to showcase side lighting. My daughter was positioned beside the window, with the light coming in from the right side of her. Isn't she a wonderful model!

Are you up for the challenge?

Mar 28, 2010

Playing With Ribbon: Child's Play

Over at Savvy and Sassy, they are having a Ribbon Rave (6 weeks of challenges with ribbons) and this week was to make a layout based on a sketch, then add ribbon flowers. So I made 3 flowers, one by folding and stapling ribbon in the center of a K & Co die cut (as seen below). I punched out a nice circle, and treated it with Glossy Accents and a lovely gem from an old set of Prima flowers.

These 2 flowers were made using a piece of cardstock, strips of ribbon, and Mod Podge. I coated both sides of ribbon, laid them next to each other, let dry and then hand cut some flowers. You can also find a flower and trace it for better results.

And here is the final product! A BRIGHT layout of my DD playing with rocks and water - HOW FUN!


Bye for now!

Mar 26, 2010

Unity Stamp Co. Simple Scrapbook Challenge

On Splitcoast Stampers, there is a Unity Stamp Co. scrapbook challenge, so I pulled out my one and only Unity stamp and created a layout. (You see, I am trying to win some more stamps because I like them so much!). PS - Thanks Julie Campbell for your blog post that pointed me to this challenge!

For this layout, using this stamp, I was kind of limited to the subject matter, but I am SO happy I made this layout. If you are wondering, that's me in the middle, the youngest of 3 girls. I scrapped about my second house, as you can see, I was young when we moved there and I lived there up until I was 15. My Mom just sold that house last year and it was strange to be with her on the last day, walking around that empty house and reliving some good memories.

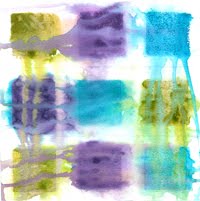
Here is a close up of one of my favourite techniques (applying 3 coats of UTEE to the paper and cracking it). I also pulled out the brayer, like I said the other day, I am seriously showing my brayer some love.

I just adore these bright orange flowers from Prima. The floss is kept in place with liquid glue. The tag has been misted with Shimmerz Eucalyptus.

I use a stapler for the ribbon mess you see below, then covered the staples with some lovely buttons.

That's all for now! If you have any questions, drop me a line or leave a comment!
Ciao.

Mar 25, 2010

Showing My Brayer Some Love and Scrapbook Star

Note this: LOVE YOUR BRAYER! I bought a brayer a while back and rarely use it. To make this typewriter stamp (Cornish Heritage Farms) come to life, follow these instructions:
Stamp image onto white paper with Versamark, apply clear embossing powder, and heat set.

  1. Trim paper to desired size.
  2. With brayer, apply dark green ink (Library Green from Ranger), but leave it blotchy. Wipe ink off image.
  3. With a second green ink (Lettuce Adirondack by Ranger), brayer over the the image and to one side only. Wipe ink off image.
  4. With black ink (Black Soot Distress Ink by Ranger), brayer over the image ONLY. You want the black to get into the image's cracks to make it stand out more.
  5. THEN - take the whole piece of paper and stamp it with VersaMark and apply 2 coats of UTEE embossing powder by Ranger. This is essentially a nice glossy coat you are adding to make the colours pop.


Here are some sneak peeks of Scrapbook Star's April 2010 Kit. It is a lovely kit, and full of girly and Spring colours with loads of embellishments to matchy match!!


Have a great Thursday friends!

Mar 24, 2010

Inspire Frame - Vinyl Art

I needed some decor for my pea green powder room and I whipped this up in a couple of hours and it goes quite well. ALTHOUGH - I plan on distressing this a bit. I want to take it apart and do some tearing on that background paper, some more stamping, maybe add some gems and other detail to make it more interesting. Stay tuned for the revised project!

VINYL - the chandelier and the word inspire were cut from vinyl with my Silhouette and placed on top of the glass. I could easily remove them if I like, which is ideal to save the glass, and frame from my mistakes!


Supplies:
Paper - 7 Gypsies
Dies - Silhouette
Stamps - Cornish Heritage Farms
Markers - Copic

Mar 22, 2010

Bad Girls - Project 52 Challenge Blog

Ok folks! Here is my first official challenge with Project 52.

PARAMETERS:

WHAT: 3D Homes:

THEME: Dreams

REQUIRED MATERIAL: Buttons

My "Thoughts & Dreams House":
For my house, I created it from scratch, which is very satisfying - to create something from nothing. I decided to make my house sort of practical by adding a slot in the top for me and my family to use to store our thoughts and dreams. I plan on sealing off the bottom, so that our thoughts are safe inside until one day we decide to open it. I think even in a couple years' time, going back and looking at our thoughts and dreams will be interesting.

I wanted my house to contain a quote that spoke to me and one that I believe...with God, all things are possible. The tree branch is a Silhouette die cut. That gorgeous time glittery paper is from The Robin's Nest. The gorgeous leaves are Prima.

I made this flower from fabric, I am in the middle of making a tutorial on how to. There are so many variations to this!


Here is my slot made with a punch from Stampin' Up! I love my Dymo Label Maker, and used it for most of my dream quotes.

Here is a ribbon wall, all kept nicely in place by using a stapler. MY ADVICE - If in doubt - use a stapler or hot glue gun!


This quote spoke to me. Dreams don't just happen or come true, it takes effort! I used the die cut frame from Silhouette to enclose this wonderful quote. See my daughter in the back, she loved the house! She had lots of questions for me, the best one being "can I have it?".

This might be my favourite side, probably because of that orange flower pops. You can really see the stamping on this side. To cover the house, I used a nice 6x6 stamp (Vintage Text by CHF) to add a little something to look at. I also used Shimmerz to give it a blue. The yellow you see here and there is actually decorative packing tape.


And here is the final side, the birds. I used 5 birds in total to symbolize my family. Having my family is like a dream come true, so here it is, on my house.

I do hope you'll consider playing along. You have until April 10, 2010 to submit a HOUSE project in the Bad Girls gallery so that we can ogle your creative genius and for consideration to be a Guest Designer with us.

See the Project 52 post for more details and for pictures of the other designer's COOL projects.

Mar 19, 2010

TIME - to Reflect...

We are having an on-line crop this weekend at Scrapbook Star and for my challenge (which will be posted later) is a reflective challenge. I just picked up these envelopes from Hero Arts and thought one of them would suit my layout, and tucked inside is an honest reflective note of where I am now, and where I was a decade ago, and a little about what I've learned along the way.

By the way - the stamps on this layout are new from Technique Tuesday (Ali Edwards) and I just love them. I think you'll be seeing a lot of them on my layouts and projects.

Below I am showing a sneak peek of my first project with PROJECT 52, the Bad Girls challenge blog. I kept on coming back to this piece, with fresh eyes every time, and I can tell you that what I originally envisioned, is not what resulted. HOWEVER, I am satisfied with the end piece. Hope you'll stop by Project 52 when all the team's projects are revealed on Monday.


Enjoy your Friday!

Mar 17, 2010

Getting Stampy! AGAIN.

When I used to design for Cornish Heritage Farms, I found many ways to stamp on my projects. It's been a while now that I have stopped using stamps on my layouts, BUT I have decided to dust off the ink pads and get back into it!

Here is a recent layout stamped with the 6x6 Vintage Text (CHF) and that lovely flower to dress up the background paper (kraft Bazzill Cardstock).


A recent Michael's find is that BEAUTY chipboard by Colorbok. I treated it with a craft adhesive spray, Doodlebug Inc glitter and then with Liquid Pearls by Ranger.

The dress form (Silhouette die cut) has been treated with Glossy Accents and pink Microbeads from Martha Stewart. And again, there is that lovely Maya Road Ric Rac ribbon I am obsessed with using. The flower and leaves are of course PRIMA> who does it better?

I hope this is the first of many more stampy projects. Thanks for stopping by! I will be flashing some sneaks of my upcoming FIRST project for PROJECT 52. The new challenge will be up Monday and you won't want to miss it!

Mar 5, 2010

Bad Girls Bleuprint and Scrap Your Crap

So Happy Together is a layout that captured 2 goals! One, was to play along with this week's Bleuprint at Bad Girls, and the other, to play along with the challenge at Scrap Your Crap.

I loved challenge #51 at Scrap Your Crap, because it actually allowed me to do just that! The challenge was to use 20 + letters in your title, and then an additional 10 embellishments. I pulled out old decorative tape from Heidi Swapp, old embellishments, such as the beach sticker, the blue gems, and the Maya Road chipboard (which is heat embossed with red - smells like Cinnamon). How about that! A Scratch n' Sniff layout! Now there's an idea. :)

Now, I couldn't have come up with this layout without being totally INSPIRED BY Anna's Bad Girls Bleuprint - see more on the Bad Girls Kits forum. See below the images that Anna provided to get the juices flowing. She also made that sketch to go along with the images. I was inspired by the colours, white background and white space, I pulled the black, red, and green from the Tommy picture, and the fabric idea from the photo (I made sure to use fabric-like ribbons). Of course, I used the sketch as inspiration as well.


Now it's your turn. I've left you with 2 challenges that should get your mojo going. GO - SCRAP - CREATE! Oh and have fun!


"So Happy Together" Supplies:
Patterned Paper: BoBunny Press, Graphic 45, Teresa Collins
Cardstock: Bazzill, Core'dinations
Flower: Prima
Ribbon: Michael's
Stamp: 7 Gypsies
Sticker Letters: KaiserCraft and Rose Moka
Die Cut: Silhouette (Bracket)
Decorative Tape: Heidi Swapp
Chipboard: Maya Road
Embossing Powder: Cornish Heritage Farms
Other: Envelope, Gems

Mar 3, 2010

Simplicity

I don't tend to do simple, but this card called for it! I just could not bring myself to add anything else, so here it is....

My most simple project ever. I love it. Maybe you will start seeing some more simple from me. It sure is quicker! :)

Supplies:

Flower: Prima
Stamp: CHF
Paper: We R Memory Keepers
Cardstock: Bazzill
Gem: KaiserCraft
Ink: Stewart Superior

Mar 1, 2010

Bad Girls - Project 52 Challenge Blog

Project 52 is a challenge blog and is part of the greater community of Bad Girls Kits. I have been given the opportunity to design for them starting TODAY! The challenges are focused on ART using all kinds of mediums, not just paper, stamps and ink (which I am very comfortable playing with). So this will be a challenge for me as well as to all who play along! I hope you check it out and play along with me, because I am almost certain we will all learn something.

They have put together a talented group of "out of the box" thinkers and what you see there will inspire you to try something new (which I am ALL about). Check out previous posts too, there is so much to peruse and fall in love with.
Bye for now!